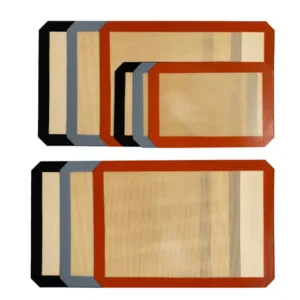
Silicone Baking Mats
1. Why Use Silicone Baking Mats for Dough and Pastry?
Normally, bakers would go for wood boards, marble countertops, or parchment paper when it comes to dough kneading or crust rolling. However, silicone baking mats present some unique benefits that make them a convenient choice
✅ Non-Stick Surface
Silicone mats are inherently non-stick, which means you can knead or roll dough without excessive flour or oil. This helps maintain the dough’s hydration level and texture, especially for recipes that require precise moisture content like croissants, puff pastry, or brioche.
✅ Easy Cleanup
After kneading or rolling, flour and dough residues come off easily with warm water and a mild detergent. There’s no need to scrape off sticky bits or worry about dough sticking to wooden surfaces.
✅ Reusable and Eco-Friendly
Unlike parchment paper, which is disposable, silicone mats are reusable thousands of times. This makes them a more sustainable and cost-effective option for frequent bakers.
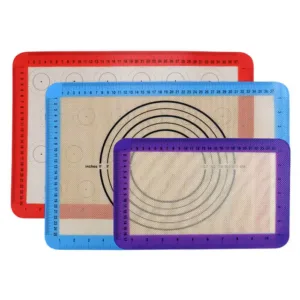
✅ Measurement Guides
Many high-quality silicone mats come printed with measurement circles and rulers, making it easier to roll out pastry doughs to the perfect size—whether it’s a pizza base, tart shell, or pie crust.
✅ Temperature Resistant
Because silicone mats are designed to withstand high oven temperatures (typically up to 480°F / 250°C), you can use the same surface for both preparation and baking, reducing the number of steps and dishes.
2. How to Use a Silicone Baking Mat for Kneading Dough
Using a silicone baking mat for kneading is straightforward, but following a few techniques can make the experience smoother and more effective.
🥣 Step 1: Secure the Mat
Silicone mats are flexible and may slip slightly on smooth countertops. To prevent this, lightly dampen the underside of the mat or place a damp towel underneath. This creates traction and keeps the mat from moving during kneading.
🍞 Step 2: Lightly Flour the Surface (Optional)
While silicone is non-stick, certain sticky doughs (like sourdough or enriched doughs) may still benefit from a light dusting of flour. The key is moderation — too much flour can dry out your dough.
🤲 Step 3: Knead as Usual
Use the same techniques you’d apply on a wooden surface. The silicone mat’s flexibility provides a soft, forgiving surface that’s gentle on your wrists while offering enough resistance for effective gluten development.
🧽 Step 4: Clean Up Easily
Once done, simply lift the mat, shake off excess flour, and rinse it with warm, soapy water. It dries quickly and can be rolled or stored flat for next time.
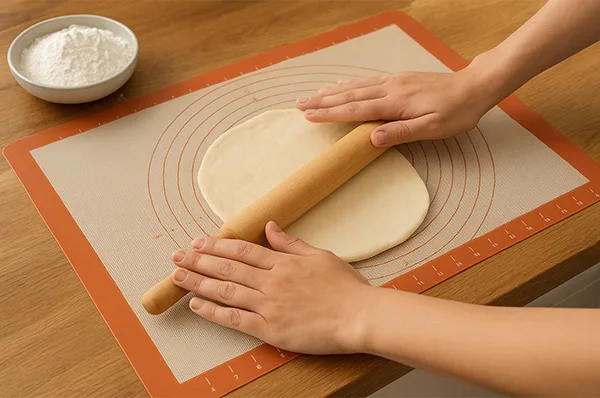
3. Using Silicone Mats for Rolling Pastry
Silicone baking mats also work exceptionally well for rolling pastry doughs such as pie crusts, puff pastry, and cookie dough.
🥧 Non-Stick Advantage
Because of their slick surface, silicone mats prevent pastry dough from sticking or tearing, which is especially helpful for delicate doughs like shortcrust or phyllo. You can easily lift and transfer rolled dough without breaking it.
📏 Built-in Measurements
If your mat has printed measurement guides, you can roll your dough to the exact diameter needed. This eliminates guesswork and ensures consistent results for pies, pizzas, or tarts.
🧊 Cool Surface Tip
Although silicone doesn’t retain coolness like marble, you can chill the mat briefly in the fridge before rolling pastry. This helps prevent butter in laminated doughs from melting too quickly.
🍪 Transfer with Ease
When rolling cookies or pastries, you can roll them directly on the mat, cut shapes, and then place the entire mat onto a baking sheet—no need to transfer each piece individually. This reduces distortion and keeps delicate shapes intact.
4. Limitations to Consider
While silicone baking mats are highly functional, they’re not perfect for every kneading or rolling task. Here are a few limitations to keep in mind:
⚠️ Not Ideal for Heavy-Duty Kneading
Very stiff doughs, such as bagel or pretzel dough, require significant force. On a silicone mat, this can cause slipping or stretching. In such cases, a sturdy wooden or stone surface might provide better stability.
⚠️ Avoid Sharp Tools
Knives, pastry cutters, or pizza wheels can damage the silicone surface. Always use plastic or silicone tools instead of metal blades to preserve the mat’s integrity.
⚠️ Limited Surface Area
Most silicone mats are around 16″ x 24″. If you need a larger workspace for bulk dough preparation, you might find the mat a bit restrictive. However, you can easily use two mats side by side.
⚠️ Temperature Sensitivity for Cold Work
Silicone doesn’t stay cold for long, so it’s not the best choice for ultra-temperature-sensitive pastry work, such as laminated croissants, where maintaining a chilled surface is crucial.
5. Tips for Getting the Best Results
To make the most out of your silicone baking mat when working with dough or pastry, follow these expert tips:
Anchor the mat to prevent sliding by placing it over a damp towel or silicone countertop sheet.
Chill the mat for 10 minutes before rolling to help with buttery doughs.
Use a silicone or wooden rolling pin to prevent scratching.
Clean with warm, soapy water — avoid harsh scrubbing pads or abrasive cleaners.
Store flat or rolled — folding may cause creases that affect rolling surfaces.
6. Why Bakers Love Silicone Mats for Dough Prep
Professional and home bakers alike appreciate the convenience of silicone baking mats for dough handling. They reduce mess, save parchment paper, and simplify cleanup—all while offering a smooth, consistent surface that enhances precision and control.
For eco-conscious consumers, these mats also align perfectly with a sustainable lifestyle. Each mat can replace thousands of sheets of disposable paper over its lifespan, reducing kitchen waste significantly.
✅ Conclusion: A Smart Choice for Modern Bakers
So, can silicone baking mats be used for kneading dough or rolling pastry?
Absolutely. They’re practical, versatile, and ideal for light to medium dough preparation tasks. With their non-stick surface, easy maintenance, and eco-friendly benefits, they are an excellent addition to any baker’s toolkit.
Just remember to avoid sharp tools, anchor the mat securely, and respect its limits with very stiff doughs. With proper care, a quality silicone baking mat can become your go-to surface for everything from breadmaking to pastry perfection.